Weaving the Waffle Weave Shawl (it is off the loom and resting in preparation for being fringed and washed) necessitated fairly frequent colour changes so I took the opportunity to try some different shuttles.
For the beige areas of the shawl I used a Crossley hand weaving shuttle. I wish that I could get another. It fits nicely in the hand and just glides across the shed straight and true with the smallest of flicks. It has a Honex tension adjustment mechanism; I think that I was told that it is made of persimmon wood.

I have two AVL 11" shuttles that I used for the coloured stripes. I bought these some time ago and have used them extensively over the years as they seem to be just the right size for scarves. I find them a little on the light side after using the Crossley and they are not very kind to any errant warp ends. As the inset on the photo below shows the tips are square rather than tapered and the Honex mechanism protrudes above the body of the shuttle. When using them I cover this protrusion with masking tape but the blunt end can still cause problems if I slightly mis-throw the shuttle or have a lazy warp end. I shan't be using these again until I have had a go at them with an angle grinder, rasps and sandpaper.
Over the years I have built up a small collection of metal tipped end feed shuttles that are for use with a fly shuttle. Because they have sharp metal tips they are not, in theory, that much good for being hand thrown but I decided to try anyway with some of the blunter ones.
The first one tried quite successfully was another Crossley which I have shown below. The tension of the yarn as it leaves the shuttle is controlled by fur like fabric that brushes against the side of the filled pirn and by some felt in hole though which the yarn leaves the shuttle. I presume that each shuttle was designed for a specific small range of yarn thicknesses as there is no mechanism for adjusting the tension. It worked fine with the yarn that I was using (11.5/2 wool). I don't have any pirns that fit but one from my AVL shuttle worked nicely enough.
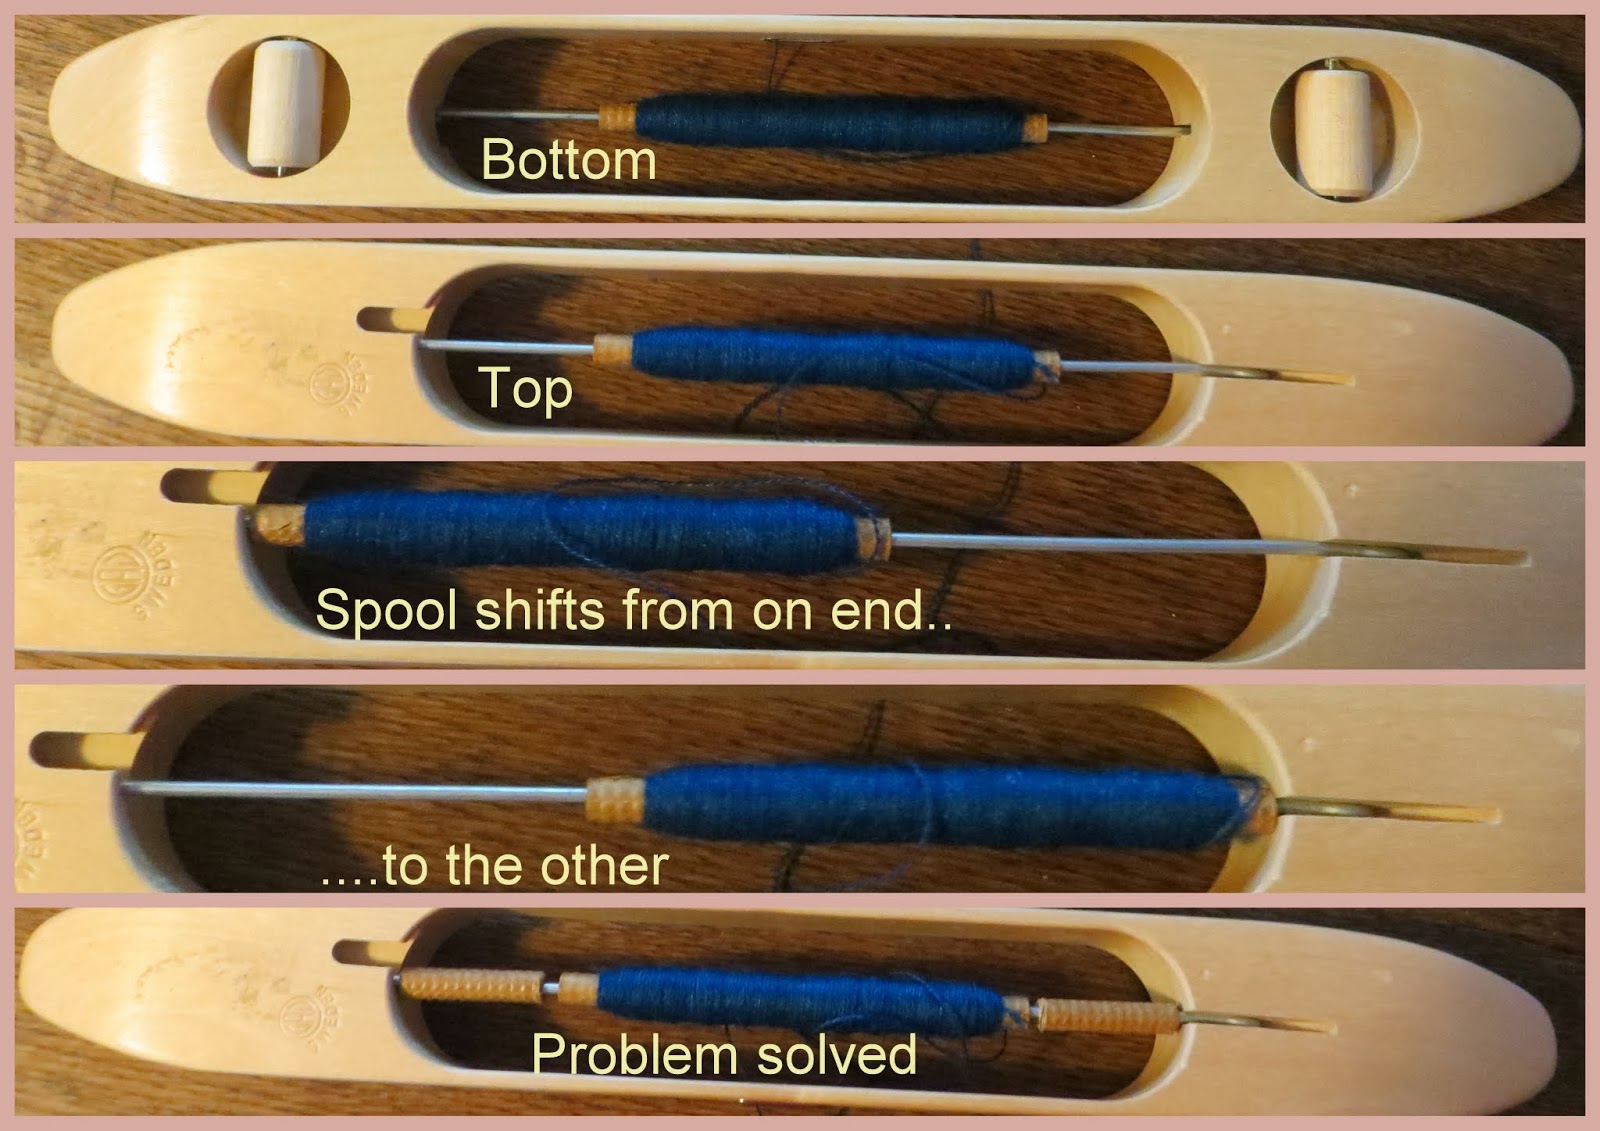
The second metal tipped shuttle that I tried was a bit of a beast but it was surprisingly easy to use. It has an adjustable Honex type tension adjuster. I thought that it might be a bit hard on the wrists but I wove with it for over an hour with no adverse effects.
I shall blunt the tips of these two shuttles a little and then they can move from my shuttle collection box to my working shuttle box.


.jpg) After a little break from weaving I have started work on a Waffle Weave Shawl. The warp is a straight 24 threading left over from the mock leno shawl that I wove just before Christmas.
After a little break from weaving I have started work on a Waffle Weave Shawl. The warp is a straight 24 threading left over from the mock leno shawl that I wove just before Christmas.


 I think that I am going to have to find some instructions on fashion photography- I frequently feel that my pictures don't do justice to the work.