Pages

Showing posts with label Glimakra Standard. Show all posts

Thursday, November 15, 2018

Selling my Glimakra/Toika Loom


After many happy years together I am sadly selling my main loom. 

Overview

The loom is a hybrid consisting of;
  • Frame, beater assembly, front and back warp, cloth and knee beams. GLIMAKRA STANDARD (120cm weaving width)
  • Shedding mechanism and harnesses; TOIKA EW24 CONTROL UNIT  (Dobby) with 24 SHAFTS

The photo below shows the loom. It is a Glimakra Standard with a Toika Control unit which can be seen on the top of the loom. The control unit manages each of the 24 shafts via weaving software which is installed on the laptop. The whole mechanism is activated by the pedal which can be seen on the floor.


Background

I bought the 10 shaft 120 cm Glimakra Standard Countermarch loom (2nd hand) in mid-2011 and later in the year I imported and installed the Toika EW24 Control unit. The installation involved removing the countermarch mechanism and shafts and replacing them with the Toika Control Unit and 24 shafts. My blog posts show what  was involved in this upgrade.
Since then this has been my main loom. I have found it the most versatile and easy to use set-up. I have enjoyed all the benefits of a big "European Style" loom combined with effortless operation and shaft configuration. Most of the posts in this blog after 2011 relate to work that I have done on this loom.

Toika EW24 Control Unit

The photos below show various views of the control unit. 


It has three connections;
  • Power
  • Computer
  • Pedal
The computer is loaded with Weavepoint  which provides the software element of the shaft control. The shafts are effortlessly raised and lowered by use of the pedal, The explanation of the operation is clearly explained on the Toika web site. 

Double Warp Beam

The loom is equipped with two warp beams. The picture on the left shows the double warp beam set-up whilst that on the right shows the operation with just a single beam. Note that this is a sectional beam.
I used two warp beams when I was weaving scarves with supplementary warps.

Glimakra Standard

For details about the Glimakra Standard Counter-march loom have a look at the Glimakra web site. I have kept all the counter-march components  (see photo below) so the loom can be reverted to its original state.

Original Specification Summary:
  • 10 shafts
  • 120cm weaving width
  • Dimensions 1.75m H x 1.60m D x 1.50m W
  • 48 warp sticks
  • 2 lease sticks
  • 10 lamms
  • 10 treadles
  • 1 fabric protection board
  • 4 rubber feet
  • 2 tie bars
  • 2 shaft holders


Accessories and Extras

The photos below show the accessories that are included with the loom.

  • 60 Warping sticks (46")
  • 4 Lease sticks (46")
  • 1 Raddle (takes 39" warp)
  • 8 Reeds (see picture below for condition)
48" 5 D
48" 12 D
48" 15 D
47" 18 D
40" 12D
40" 16 D
32" 10 D
30" 15 D


The manuals are shown below;


Also included is an elderly Dell Laptop (Windows XP) loaded with Weavepoint software and with the software disc.


Summary

To summarise, what is on offer is;

  • 120cm weaving width 24 shaft loom (Glimakra Standard) with automated control unit (Toika EW24)
  • Double warp beams
  • Accessories and reeds
  • Manuals
  • Computer and Weaving Software


What next

All I have to do now is decide on a fair and reasonable asking price and determine how to advertise it. And don't change my mind!


Tuesday, August 27, 2013

Warp Swap

Having got the CB loom polished, assembled, beamed, entered and gated I settled down to weave but after awhile I started to have subversive thoughts. The gist of the thoughts were that it was silly to be weaving a twill scarf on this (CB) loom when I had a perfectly good semi automated loom (Glimakra 24S with Toika loom controller) that would do the job more efficiently. I debated with myself  on this for a while but was reluctant to logically follow an argument that would render this CB loom redundant and eBay fodder.  Then I remembered my lurking project that would probably be better on a completely manual loom - Overshot. I'll go through my reasoning in another post but my first priority was to clear the CB loom.


The objective as to move the warp from the CB loom to the Glimakra.

I cut out the weaving I had done and rewound the warp back on to the warp beam. I took the warp beam off the CB loom and suspended it over the warp beam of the Glimakra.


This picture shows the warp with its lease sticks in place and tied onto the apron rod of the Glimakra.


To get a bit of tension I slung a couple of weight over the CB warp beam.

The picture below shows the situation half way through the process. The warp is being wound from the CB warp beam onto the Glimakra warp beam. The CB warp beam is suspended from the Glimakra frame directly above the Glimakra warp beam. Lease sticks are in place to maintain the cross and tension is supplied by some weights.


It was not plain sailing all the way. At some time during the initial beaming of this warp I managed to cross over some of the bouts which meant that when winding from one beam to another there were threads that crossed over each other and were reluctant to move smoothly through the lease sticks and pilled together. The next time I beam a warp I shall pay particular attention to see if I can work out where my mistake lies.

It is all done now so on to the next stages. I have had a touch of flu over the past few days and have used my lucid moments to study overshot drafts and change my mind a hundred times as to which pattern shall be the first cab of the rank.


Friday, January 6, 2012

Toika Control Unit onto a Glimakra Standard - Levelling the shafts


Where was I? Christmas and New Year and the lead up were a whirlwind and whilst I was able to snatch bits of weaving time there was no time left to blog.

When I last wrote I was feeling very pleased with myself having successfully put everything together and demonstrating that I had a working loom.

The next task was aligning and straightening the shafts. The photo on the left  shows a red cord that I ran between the front and back beams; this was aligned with the bottom of the heddle eyes on the front and back shafts.

I used a small spirit level to ensure that the shafts were level  and then I ran two  cords across the tops of the shafts on each side (yellow cord in the photo below) and used these to aligned the rest of the shafts to the front and back shafts.

Once this was done the loom was ready to thread but I didn't get back to this until after Christmas.


Sunday, November 20, 2011

Toika Control Unit onto a Glimakra Standard - Nearly finished!


It has been a busy week at work and the lovely weather this weekend lent itself to tennis,cycling and a bit of swimming. In spite of all these distractions I have virtually finished the installation - I just have to do a bit of adjustment of the harnesses and then I am ready to thread, sly and weave as I already have a warp sitting on the back beam.

I finally got the harnesses finished on Friday evening and have been hanging them over the weekend. It was just a case of follow the instructions and try to get everything as level as possible from the outset. I have a small spirit level that sits on top of the shafts and I got all the shafts sitting neatly on two broom handles before I tied them up.

There was one slightly hairy moment when the weight of the shafts pulled the control unit across to one side - hence the two pieces of crenelated wood that can be seen in one of the pictures [they are the shaft holders that I won't be needing any more].


I had previously loaded the WeavePoint software onto a laptop and it was a matter of minutes to connect the unit up to the power and the computer and, hey presto, it all worked  first time, immediately!  I pressed the peddle and shafts moved up and down according to the draft so I poured myself a cold beer and that's it for this weekend. Brilliant!


Monday, November 14, 2011

Toika Control Unit onto a Glimakra Standard - Day 2

Nothing very exciting today; just putting the harnesses together. You start of with this;


and end up with 24 of these;


The way that the harnesses are put together is quite neat - rubber "O" rings that fit into indentations on the metal rods that connect the top and bottom heddle bars at each side and hold it all nice and snug. Much less stressful than the methods where the bottom heddle bar just dangles on the heddles. 
I did 12 harnesses tonight so I should be able to knock the rest off tomorrow.


Sunday, November 13, 2011

Toika Control Unit onto a Glimakra Standard - Day 1

The story so far...yesterday I unpacked  the parts of my new Toika EW24W Computer Control Unit. Today I start fitting it to my Glimakra Standard.

The first job was to remove everything to do with the jacks, shafts, lamms and treadles on the Glimakra. A bit of a pity as it took me an age and a lot of effort to put it all together in the first place. The end result of all this work was a table covered in sticks and string and an empty loom.


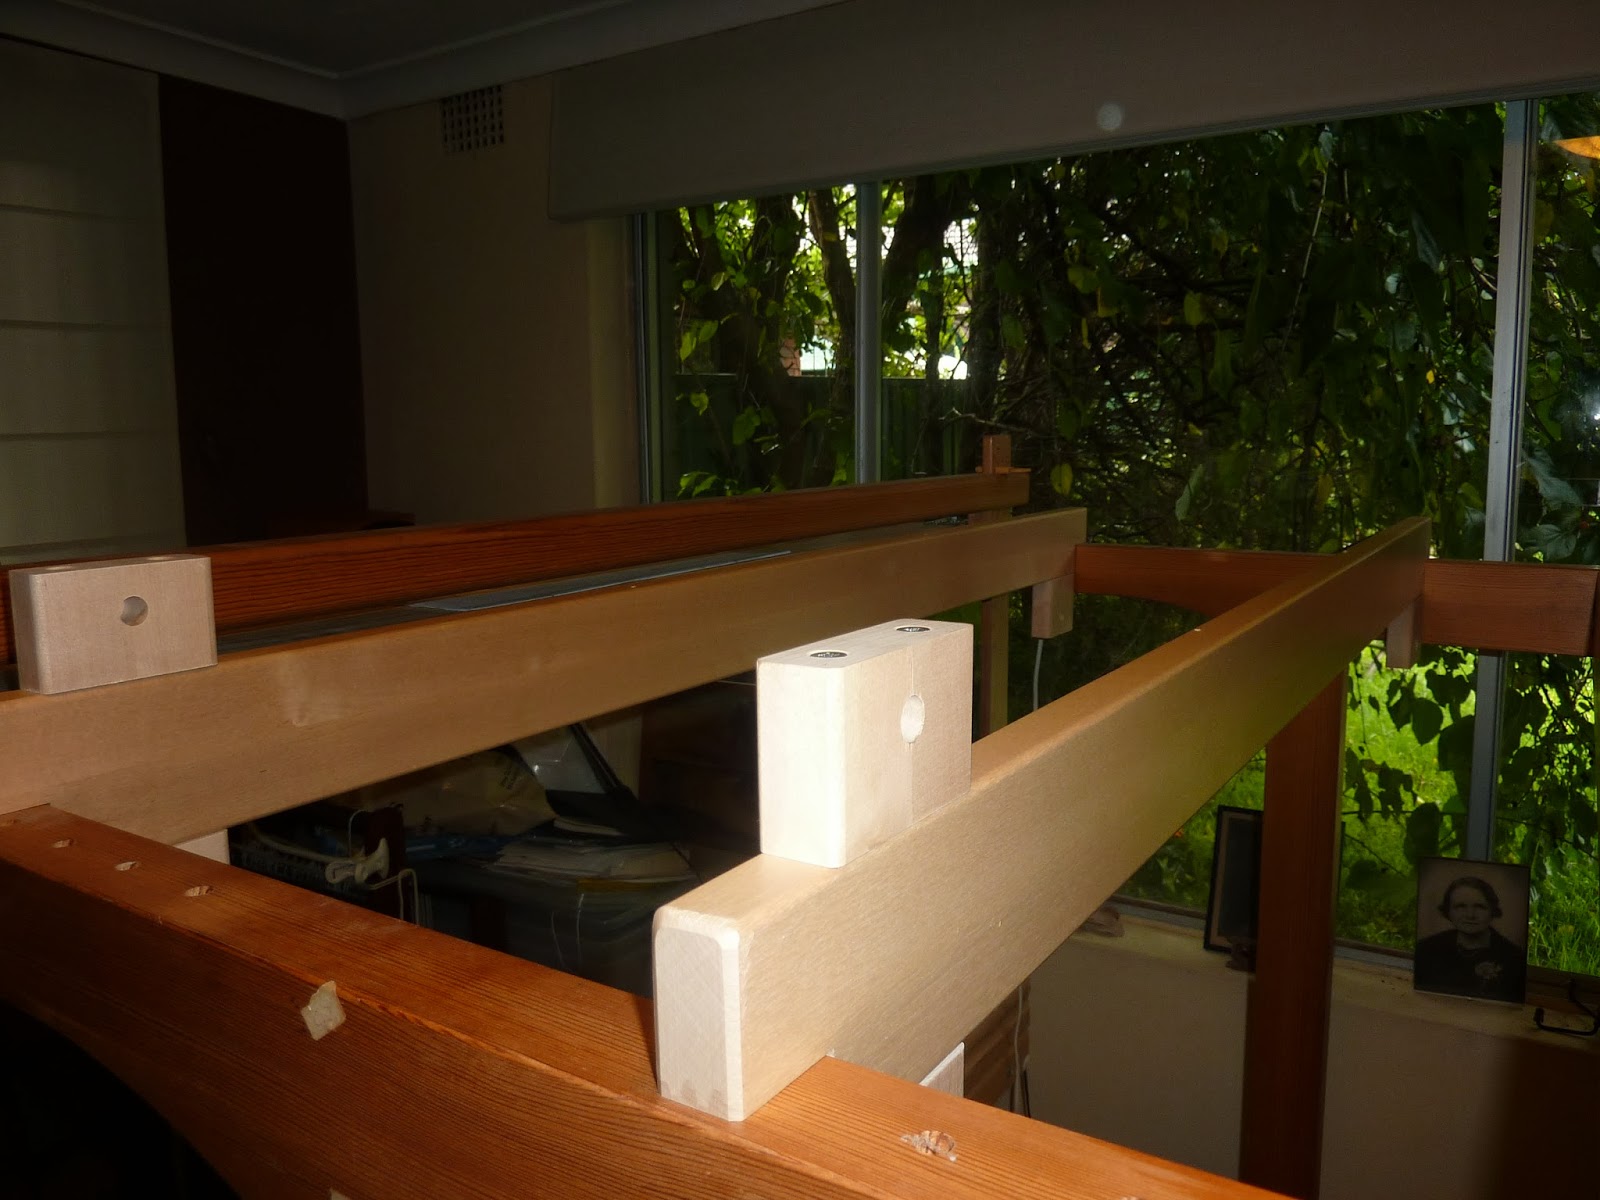
The computer unit sits on two rails that that fit across the top of the loom and rest on the castle at each side just behind the beater assembly. The instructions are precise as to their orientation and they fitted exactly.


Having done that the pulleys have to go on. There are three sets of 24 pulleys which are mounted on three rods which are threaded through holes in the rails an held in place by cotter pins. Again I just followed the instructions.


.
As the photos below show the two sets attached to the right hand side of the rails. There is another set on the left.


Once the pulleys are in place on their rods the rails are at the correct distance apart to receive the control unit. This lifting up and positioning was a two person job but straight forward. The unit sits neatly on top of the rails.


There holes on the bottom of the rails that probably align with holes on top of the castle for Toika looms so that a dowel peg can keep the rails in the correct place on the castle. They didn't align with any of the holes on the Glimakra because I have the front rail tight up against the beater assembly. However a hole just behind the back rail took a peg which will stop the rails from moving.


I think that this position will be OK but it isn't I will just have to adjust it later on. The aerial view to the left shows how it all fits snugly together.

That it for today. Tomorrow evening after work I will start putting the harnesses together.

Saturday, November 12, 2011

Toika Computer Control Unit

After a journey from Finland to Australia, a journey of about 10,000 miles for an energetic crow but longer by boat, my Toika EW24W has arrived. I combined the order with Liz and she did all the messing around to get our boxes through customs and quarantine - quite a palaver for her.

So far all that I have done is unpack the parts, read the instructions and looked at everything closely to identify what it is and workout in my mind where they all fit into the great scheme of things.


There is one problem that I need to address first. As I have been using my AVL recently the Glimakra Standard to which I am going to fit all this has become a bit of a dumping stand. Clearing all of this stuff and finding homes for it will be the first job for tomorrow.