
Wednesday, July 28, 2010
Autumn Leaves
My needlepoint is finished and back from the framers. I like the tessellation and I shall certainly use the colours again.


Monday, July 19, 2010
Unknown Brackets on Beater Box
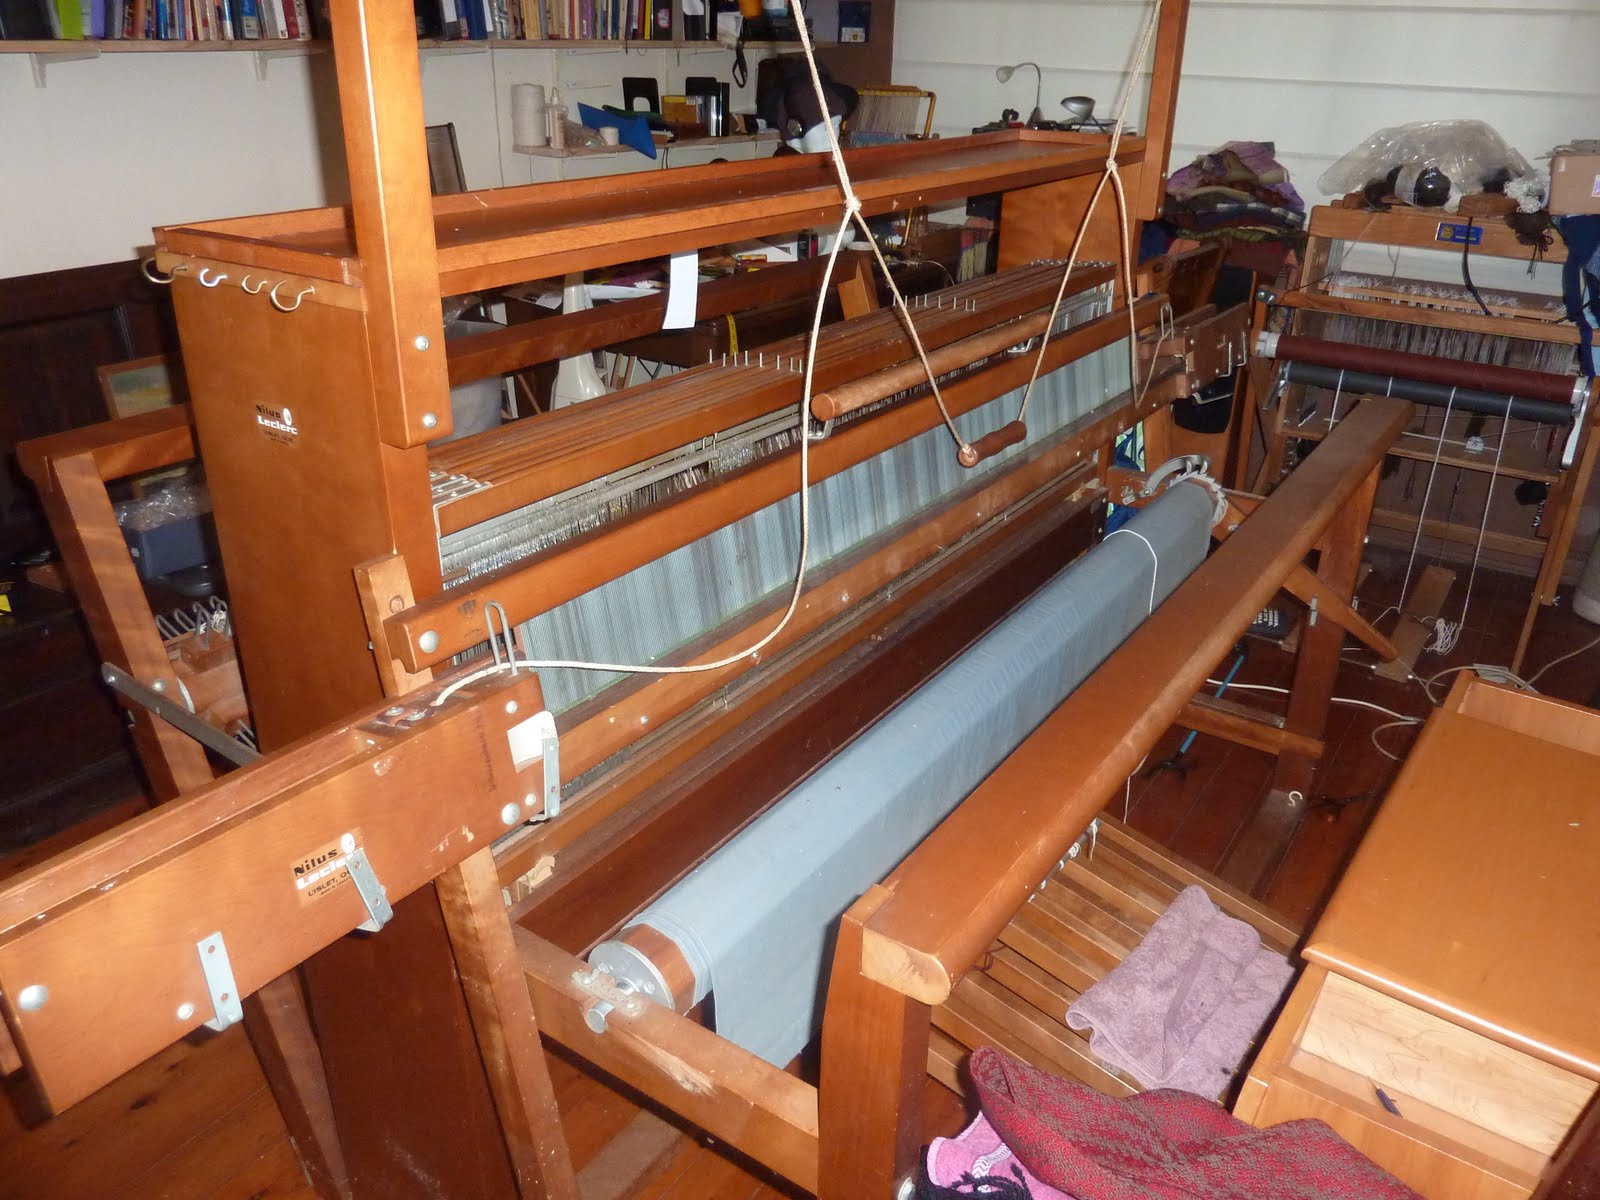
 At some stage in the past someone has screwed three L shaped brackets to the bottom of the flying shuttle beater box at each end so that one arm of the bracket sticks up vertically in front of the box with gap between the bracket and the front of the box of about half an inch. I presume that they are later aditions as I can see no reference to them in the Leclerc documentation.
They look as if they are designed to hold something that slots into the gap. I don't want to remove them if they could prove useful.


Counting heddles


Earlier I said that I had checked the heddles for this project. The statement was true but useless as the basis of any planning because what I had missed somewhere along the way is that there was a completely uneven distribution of heddles between the shafts.
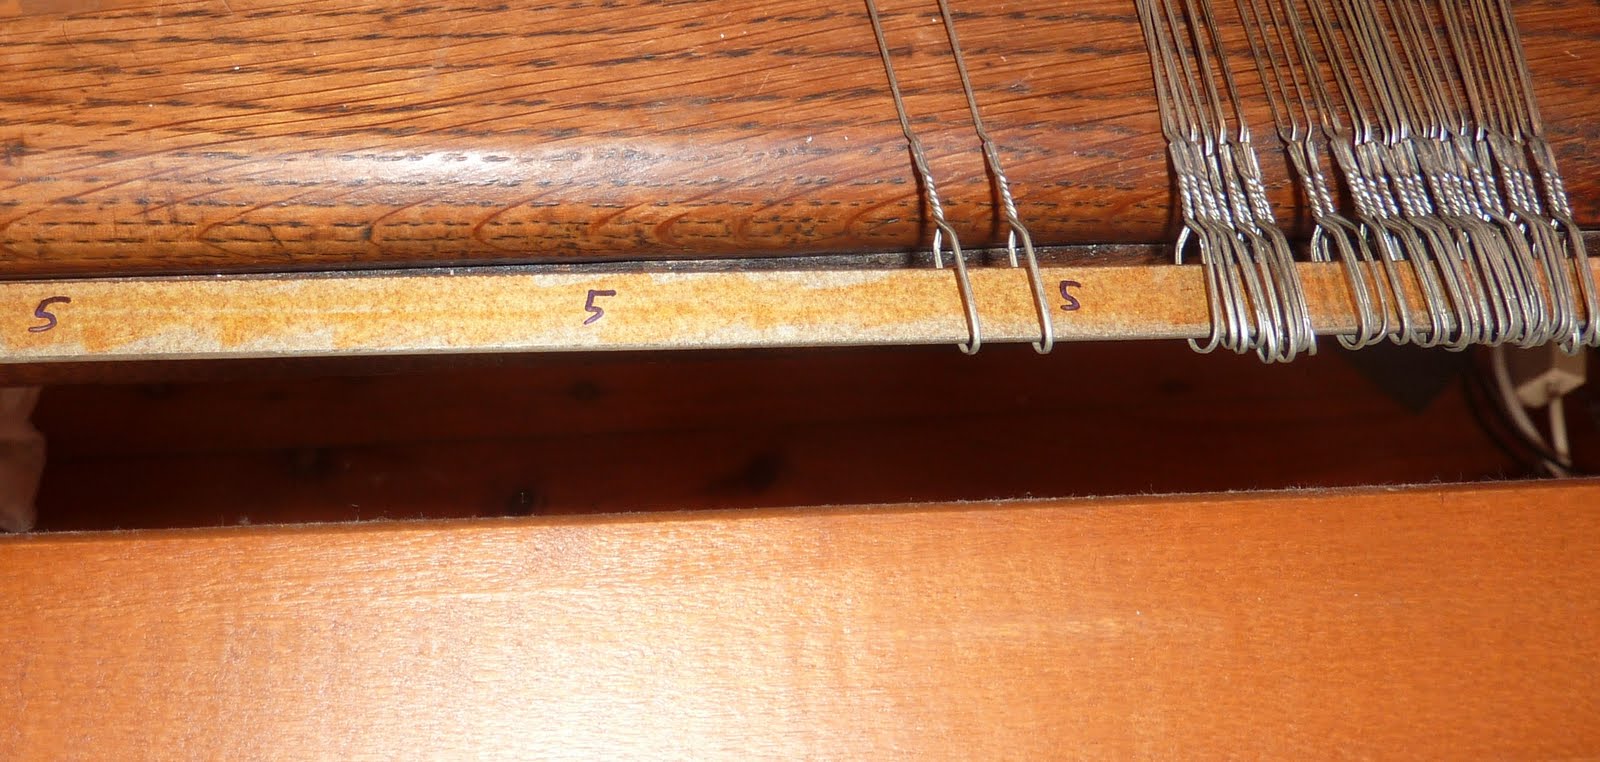
So what I had to do was get all the rubbish of the castle, then remove the top of the castle, slide out the shafts and then remove and add heddles to get an even distribution. I used cable ties to slide the heddles on and off the heddle support bars and there were no mishaps. Look at the build up of dust and fluff on the frame.
What took the time was that this exercise provided an opportunity to do several other maintenance tasks;
- Get the vacuum cleaner nozzle in amongst the jacks and lamms
- Clean and polish everything exposed by the removal of the shafts
- Lubricate the metal links between the lamms and the jacks
- Colour code and number the heddle support bars (for ease of threading)
- Clean the shafts
- Find a proper home for all the stuff that was on top of the castle


Wednesday, July 14, 2010
Beamed at last
The warp for the Big Block Blue Blanket is safely on at last. It took slightly longer than expected but it is done. The next task is to distribute the heddles evenly. As I am using the full width of the loom I can't have the spare heddles bunched up at the sides of the shafts, they must be spread out amongst the active heddles. I have been caught out by this one in the past on a table loom.


Wednesday, June 23, 2010
Big Blue Block Blanket
 All the planning is done, the wool is ordered and delivered, the heddles are counted and I even have a couple of five foot long lease sticks so there is nothing to stop me starting to beam the warp. This is the pattern that I should end up with:-
I am putting on a 9 yard warp which will be enough for two blankets. I am still working on the design for the second blanket; I am planning to be a bit more adventurous and use more than one colour in the weft.
I have a busy work week until the weekend, so perhaps on Saturday I can get started.....
Tuesday, June 22, 2010
Back to the Tent Stitch
The sample did not work as I planned as I put on a ridiculously short warp so I was only able to do about two inches of the double weave that I wanted to sample but I did manage about eight inches of double two. I have rolled it up and put it away for consideration some time in the future.
My next project will be a blanket (twill blocks) using the flying shuttle on my Nilart. Whilst I have been planning this I have resurrected a piece of needlepoint that I haven't touched for nearly three year, in fact since I took up weaving. It took me a while to remember the basic tent stitch, but I am up and running now, and will get this finished before I start on the blanket.

My next project will be a blanket (twill blocks) using the flying shuttle on my Nilart. Whilst I have been planning this I have resurrected a piece of needlepoint that I haven't touched for nearly three year, in fact since I took up weaving. It took me a while to remember the basic tent stitch, but I am up and running now, and will get this finished before I start on the blanket.

Wednesday, May 26, 2010
Tying on a new warp
My next warp on this threading (Double 2 & Stitched Double Weave) is Bendigo 2 ply wool. Having only tied on a new warp to the old once before (not a success) I did a bit of research, studied my class notes from when we had a demo and looked at this blog here; http://leighsfiberjournal.blogspot.com/2007/08/tying-on-new-warp.html
I tried this way but could not mange to have the warp in my left hand with the cross neatly separated by my fingers AND select the correct ends AND tie knots at the same time. I got cramps, dropped things and generally got into a right royal mess. But I persisted and as I struggled along what Adam Smith wrote " Men are much more likely to discover easier and readier methods of attaining any object, when the whole attention of their minds is directed towards that single object, than when it is dissipated among a great variety of things" started to become true.

I gave up trying to hold the new warp but put it into open ended lease sticks made by taking the cross maker from my AVL warping wheel and attaching it to the beater arm. Picking out the next new warp thread became easy. I overcame the problem of disentangling the old warp ends as they emerged from the reed by combing them out and holding them in place with a mini reed from a tension box.

I wound little warp chains of 24 ends at a time; I wasn't that speedy but the whole operation became completely stress free.
.
I tried this way but could not mange to have the warp in my left hand with the cross neatly separated by my fingers AND select the correct ends AND tie knots at the same time. I got cramps, dropped things and generally got into a right royal mess. But I persisted and as I struggled along what Adam Smith wrote " Men are much more likely to discover easier and readier methods of attaining any object, when the whole attention of their minds is directed towards that single object, than when it is dissipated among a great variety of things" started to become true.

I gave up trying to hold the new warp but put it into open ended lease sticks made by taking the cross maker from my AVL warping wheel and attaching it to the beater arm. Picking out the next new warp thread became easy. I overcame the problem of disentangling the old warp ends as they emerged from the reed by combing them out and holding them in place with a mini reed from a tension box.

I wound little warp chains of 24 ends at a time; I wasn't that speedy but the whole operation became completely stress free.
.
Stitched Double Weave
 Once I got started I found it difficult to stop as I wanted to see what each new motif would look like. The end result is that what was intended as a sampler has become a wall hanging. A bit ropey in certain places and a bit OTT but my story is that it meant to be looked at from afar!
 The photo is equally ropey and doesn't do full justice to the splendour of this piece of fabric art.
If I were to use this for something like a shawl I think that the more subtle patterns would look best - diamonds or little hollow motifs. I am planning to tie on another warp so I will try something a little more subtle.
We studied Double Two in our weaving class last week and it is serendipitous that this threading that I put on for stitched Double Weave is also a Double Two threading
.
Tuesday, May 18, 2010
Stitched Double Weave
At long last I have started work on my Stitched Double Weave sampler. The draft is Strickler #691 with the treadles moved around a bit I could understand it better. The draft below is as it was just before I converted it to lift-plan. It shows the "theoretical" tie up as opposed to the practical.

Treadles 1 and 3 weave brown in the top layer on shafts 7 & 8. Treadles 2 and 4 weave ecru in the bottom layer on shafts 1 to 6 (7 & 8 are also lifted every time to lift the top layer out of the way when weaving the bottom layer). The stitched design is produced by lifting any combination of treadles 6 to 11 when weaving the top layer. This pulls individual stitches of the bottom layer into the top layer to form the pattern; in the example below, a heart and a box shape. The practical tie up is as shown below. I got the idea of deconstructing a tie up into its theoretical components from Weaver's Issue 2 Summer 1988 and some of my class notes.
 I have put on a warp of bright cotton in blue and yellow so that I can see exactly what is happening. Rather than having a print out of the lift plan I have positioned my net book computer next to the loom so that I can use a magnified view of the treadling and the cursor keys to check where I am. I am finding it much easier that marking off on a bit of paper. I change the colour of a weft on the screen to mark where I am whenever I take a break.

Getting the warp onto the loom took much longer than it should have done because of some silly errors that I made because I didn't properly think through how to thread two warps when using a double back beam.The photo below shows the moment when I was halfway through sorting out my problems.

 I also became distracted on a nice sunny day by a side project that I have on the go which is weaving a wall hanging. The idea comes from this book ( I felt that I should put on a pair of flared trousers just to read it).
  There are only three different techniques used and I am particularly taken with warp wrapping which has possibilities. I am not sure what I shall do with it when it is finished as my wife has issued a pre-emptive banning order!

Treadles 1 and 3 weave brown in the top layer on shafts 7 & 8. Treadles 2 and 4 weave ecru in the bottom layer on shafts 1 to 6 (7 & 8 are also lifted every time to lift the top layer out of the way when weaving the bottom layer). The stitched design is produced by lifting any combination of treadles 6 to 11 when weaving the top layer. This pulls individual stitches of the bottom layer into the top layer to form the pattern; in the example below, a heart and a box shape. The practical tie up is as shown below. I got the idea of deconstructing a tie up into its theoretical components from Weaver's Issue 2 Summer 1988 and some of my class notes.
 I have put on a warp of bright cotton in blue and yellow so that I can see exactly what is happening. Rather than having a print out of the lift plan I have positioned my net book computer next to the loom so that I can use a magnified view of the treadling and the cursor keys to check where I am. I am finding it much easier that marking off on a bit of paper. I change the colour of a weft on the screen to mark where I am whenever I take a break.
Getting the warp onto the loom took much longer than it should have done because of some silly errors that I made because I didn't properly think through how to thread two warps when using a double back beam.The photo below shows the moment when I was halfway through sorting out my problems.

 I also became distracted on a nice sunny day by a side project that I have on the go which is weaving a wall hanging. The idea comes from this book ( I felt that I should put on a pair of flared trousers just to read it).
  There are only three different techniques used and I am particularly taken with warp wrapping which has possibilities. I am not sure what I shall do with it when it is finished as my wife has issued a pre-emptive banning order!
Thursday, April 29, 2010
Texsolv Heddles are easy to put on!
I was not looking forward to putting extra texsolv heddles on my Ashford loom as the last time I put some on a loom it was on 24 shafts and it took a very long time.
As one tends do do nowadays when pondering on a problem, I did a google and came to this site, http://www.earthguild.com/products/weaving/texhed/rtexhed.htm, and it all become clear. You do not take off the ties on the bundles of heddles until after you have put them on the harness, so they all go on at once in three simple steps! I have been cutting the ties and putting them on one by one! Oh wa ta na Siam!


As one tends do do nowadays when pondering on a problem, I did a google and came to this site, http://www.earthguild.com/products/weaving/texhed/rtexhed.htm, and it all become clear. You do not take off the ties on the bundles of heddles until after you have put them on the harness, so they all go on at once in three simple steps! I have been cutting the ties and putting them on one by one! Oh wa ta na Siam!


Tuesday, April 27, 2010
Flying shuttle on Nilart and not enough heddles on Ashford
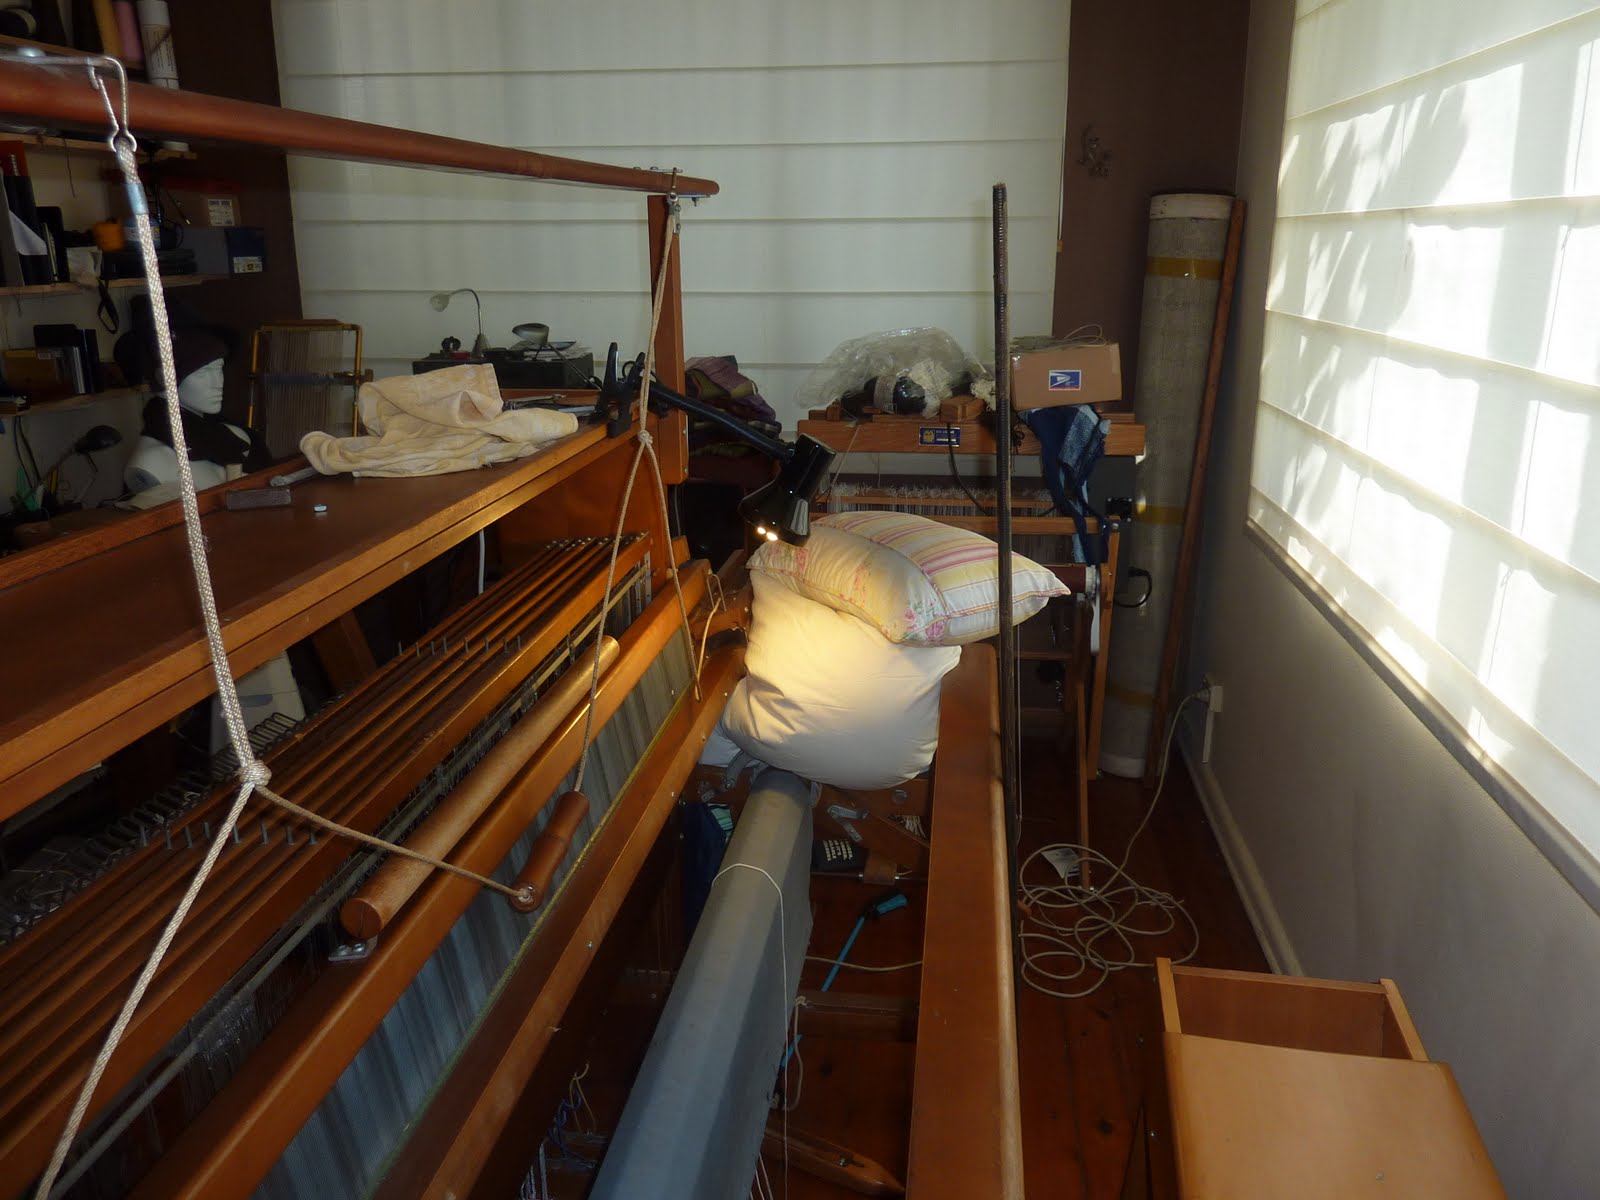
Whilst cleaning my Nilart I decided to fit the flying shuttle beater. The fitting was no problem, but oh my gosh, do those shuttles go! The second picture shows the barricades of pillows that I had to put in place to catch the damn thing before it wreaked total havoc. Once I realised that the problem was that the cord was too loose and was deflecting the shuttle order was restored.

 I was very tempted to put on a warp straight away so I could start using it but I was very good and stuck to my plans to work on the stitched double weave sampler.
 Before I do anything else I have to put on some more heddles; not my favourite task. I do feel that the manufacturers could have supplied just a few more to start off with. The draft that I am using has one layer threaded on shafts 7 and 8 whilst the other layer is spread between shafts 1 to 6, hence the discrepancy in heddle numbers. The same problem would have arisen if I had decided to do some Huck.

 I was very tempted to put on a warp straight away so I could start using it but I was very good and stuck to my plans to work on the stitched double weave sampler.
 Before I do anything else I have to put on some more heddles; not my favourite task. I do feel that the manufacturers could have supplied just a few more to start off with. The draft that I am using has one layer threaded on shafts 7 and 8 whilst the other layer is spread between shafts 1 to 6, hence the discrepancy in heddle numbers. The same problem would have arisen if I had decided to do some Huck.
Sunday, April 18, 2010
No warp on the loom
Now that the poppy waffle scarf is off I have come to the end of the 15 yard warp that I put on to my Nilart loom last August. I am at a bit of a loss as it had almost become a permanent fixture. Putting on the warp was interesting as it was the first time that I had done such a long warp. It nearly got away from me a couple of times but it all came good in the end.

I wove two Brighton Honeycomb scarves before we went on holiday in mid October, a twill scarf in November and then the loom sat idle for two months whilst I moved on to some other projects.This year I have woven a twill scarf using an alpaca yarn for the weft and last of all came the waffle weave scarf.


I shall give the loom a good clean and polish and check all the screws and bolts, then it can have a rest whilst I get back to a stitched double weave sampler that I have half beamed onto a table loom.

I wove two Brighton Honeycomb scarves before we went on holiday in mid October, a twill scarf in November and then the loom sat idle for two months whilst I moved on to some other projects.This year I have woven a twill scarf using an alpaca yarn for the weft and last of all came the waffle weave scarf.


I shall give the loom a good clean and polish and check all the screws and bolts, then it can have a rest whilst I get back to a stitched double weave sampler that I have half beamed onto a table loom.
Twill Scarf

The pattern is the first one in "A Weavers Book Of 8 Shaft Patterns" (ed. Carol Strickland) and it was a nice "comfort weaving" exercise. I have used the draft before on another twill scarf but this one went much better.

Poppy Waffle Scarf is finished
 I took the scarf off the loom on Thursday and I have had a pleasant time twizzling, repairing and finishing. Twizzling takes time so if I embark on a shawl I shall have to invest in an electric hair braider. I took the opportunity to combine this with a physical and digital reorganisation of my CDs.

Here are some before and after photos to record how much" waffling" I achieved. It certainly changes! The photo on the right is a more accurate representation of the colour; the weft is Bendigo 2 ply "Holly". This draft obviously does not produce super deep cells (see here for the real thing http://fibresofbeing.wordpress.com/2010/04/08/waffle/). I shall probably return to this structure when the pressure for new tea towels becomes too much to resist.

Sunday, April 11, 2010
Finding the time

The frog is called Freddy.
Thursday, April 1, 2010
Poppy Waffle

I started weaving this today today. In future I am always going to do a sample when changing the weave structure. On this scarf I started as soon as I could after lacing on and I had a succession of gremlins (broken selvedge, incorrect warp tension, shuttle too tight, weight falling off the warp beam) within the first nine inches. Once all these things were fixed and I was into the rhythm of the weave everything was fine.
I won't be doing much weaving over the Easter weekend as we are off down south to a rello bash but I might be able to get a bit more done on Monday and I should have it off the loom by next weekend. Then I have to decide what to put on this loom next; at the moment it is a toss up between huck lace or deflected double weave.
Sunday, March 28, 2010
Waffle Weave
Gosh, I didn't realise that I had not done an update for such a long time! More resolve!
A couple of weeks ago we studied waffle weave at our weaving class (http://nsweave.org.au/learn/class.html). I have enough warp on my loom, threaded straight 8 at a twill sett, for one more scarf so I am going to try waffle weave. The waffle weave four shaft pointed drafts included in our class notes translate nicely into straight 8 threading and I selected the one below because shafts 2 and 3 weave plain weave which means that I don’t need a floating selvedge.

 On the left is the original draft and on the right is the 8 shaft derivation
 I am using a red weft so I have named the colour scheme Poppy.
The frustrating thing is that I got all of this preparatoty work done by yesterday afternoon ready for some serious weaving on Saturday night and Sunday morning but I have had to be at work because of some major problems that need to be attended to. I hate computers!
A couple of weeks ago we studied waffle weave at our weaving class (http://nsweave.org.au/learn/class.html). I have enough warp on my loom, threaded straight 8 at a twill sett, for one more scarf so I am going to try waffle weave. The waffle weave four shaft pointed drafts included in our class notes translate nicely into straight 8 threading and I selected the one below because shafts 2 and 3 weave plain weave which means that I don’t need a floating selvedge.

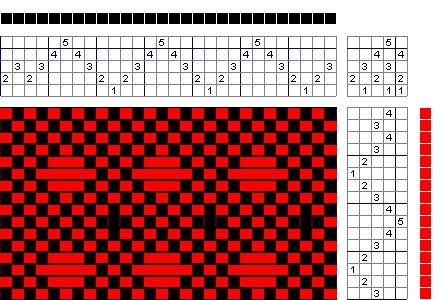 On the left is the original draft and on the right is the 8 shaft derivation
Setting up the loom was easy – all I had to do was rethread the last two threads on each side into shafts 8 and 9, reweight the selvedges and then get under the loom to change the tie up. There are 5 treadles, odd numbers on my left foot, even ones on the right. Whilst I was under the loom I put in more texsolve cords with arrowherad clips to replace the knotted nylon tie up cords that came with the loom.

The frustrating thing is that I got all of this preparatoty work done by yesterday afternoon ready for some serious weaving on Saturday night and Sunday morning but I have had to be at work because of some major problems that need to be attended to. I hate computers!
.
Saturday, May 16, 2009
Tree Trunks Twill
Concept
In May 2008 my wife and I visited the National Gallery of Australia to see the exhibition Turner to Monet. It was absolutely brilliant and I wished we could have stayed longer. I was very taken with "Tree trunks in the grass" by Van Gogh and I saw lots
of complex twills within the painting. When we got home I assembled some of my cones of wool that were as close as I could get to the colours of the painting and came up with a design for a striped twill scarf.
Details
Straight Twill, 3/1 tie up, straight lift
LeClerc Initiation 4S
Warp & Weft, Bendigo 2 ply (2927 yds/lb)
Warp colours, Mulga, Pampas, Guava, Sequoia, Moss
Weft colour, Seaquest
Sett 18epi
Width 12", 216 ends
Warp length 240""
PPI 16
Final width 11.5"
Final length (excl. fringes) 70"
 Results
Well, I am going to have to try again to get a match with Vincent's colours but no matter as his picture sparked an idea. I wove the second scarf with a herringbone lift but to my shame I have yet to twist the fringe and wash it. It is currently masquerading as a wall hanging in the dining room.
In May 2008 my wife and I visited the National Gallery of Australia to see the exhibition Turner to Monet. It was absolutely brilliant and I wished we could have stayed longer. I was very taken with "Tree trunks in the grass" by Van Gogh and I saw lots

of complex twills within the painting. When we got home I assembled some of my cones of wool that were as close as I could get to the colours of the painting and came up with a design for a striped twill scarf.
Details
Straight Twill, 3/1 tie up, straight lift
LeClerc Initiation 4S
Warp & Weft, Bendigo 2 ply (2927 yds/lb)
Warp colours, Mulga, Pampas, Guava, Sequoia, Moss
Weft colour, Seaquest
Sett 18epi
Width 12", 216 ends
Warp length 240""

PPI 16
Final width 11.5"
Final length (excl. fringes) 70"
 Results
Well, I am going to have to try again to get a match with Vincent's colours but no matter as his picture sparked an idea. I wove the second scarf with a herringbone lift but to my shame I have yet to twist the fringe and wash it. It is currently masquerading as a wall hanging in the dining room.
There were quite a few first in the weaving of these scarves;
- Taking the reed out of the beater and supporting it horizontally for sleying.
- Using an end feed shuttle
- Using a roll of paper to measure woven length
- Cutting off the first item and then re attaching the warp for the second item
- A home made friction brake


Herringbone Twill Scarf
 Concept
This was my first twill scarf which I wove in November 2007. We had woven a twill sampler in class earlier in the year and I wanted to put what we had learnt into practise. Another driver was that I had just bought a load of 2 ply wool so there were lots of interesting colours to think about as well.
I put on a long warp, wove a multi coloured sampler and then wove this scarf. The idea of the broad stripes at the ends came from a Paul Smith scarf I had seen.

Warp & Weft, Bendigo 2 ply (2927 yds/lb)
Warp colour,, Pampas
Weft colours, Pampas, Guava & Celery
Sett 18epi
Width 10", 180 ends
Warp length 182""
PPI 16
Warp colour,, Pampas
Weft colours, Pampas, Guava & Celery
Sett 18epi
Width 10", 180 ends
Warp length 182""
PPI 16
Final width 8.5"
Final length (excl. fringes) 55"
Final length (excl. fringes) 55"
 Results
 I made a miscalculation on the warp length and ended up with only 55" of scarf ; I now use an adding machine paper roll attached to the cloth beam to determine how much is left to weave. I consider this as my "overcoat" scarf, to be tucked in neatly under the collar.
Considering the range of colours I had to choose from I think that I was a little timid in my selection. However, I enjoyed weaving it, made some good learning mistakes and have a scarf for occasional wear.
Subscribe to:
Posts (Atom)